开始
今天我们学一下ncnn怎么进行网络前向的,学习了之后,会发现ncnn的网络前向流程的设计是多么的优雅,废话不多说,先插一个小红旗压压惊:

作用
网络的前向运算流程在一个神经网络前向框架里面中是处于核心地位的.我们把输入图片送到ncnn的第一个blob,然后通过调用每一个层的前向forward运算函数,来计算每一个层的输出结果,最终得到你想要的结果.
实现
ncnn为了更好的实现forward网络前向,定义了一个新的类:Extractor.这个类的主要作用是提供输入数据的接口和输出数据的接口,同时它还保存着每一个网络层计算的结果.我们先来看看这个类的概况图:

这里对Extractor的友元函数Net::create_extractor()做一个说明.
它其实首先是Net类的一个成员函数,它的作用是用一个Net类的对象,调用自己的成员函数,去创建一个Extractor类的对象.
由于它也是Extractor的友元函数,所以它可以访问Extractor的所有成员变量和成员函数,所以它也就可以调用Extractor类的构造函数,所以它就可以实现用一个Net类的对象,调用Extractor的成员函数,去创建一个Extractor类的对象.
我们现在来看一下它是怎么把输入图片(已经转化为ncnn::Mat)通过input函数,给放到对应的blob里面的:
1
2
3
4
5
6
7
8
9
10
11
12
| int Extractor::input(const char* blob_name, const Mat& in) {
int blob_index = net->find_blob_index_by_name(blob_name);
if (blob_index == -1) return -1;
return input(blob_index, in);
}
int Extractor::input(int blob_index, const Mat& in) {
if (blob_index < 0 || blob_index >= (int)blob_mats.size()) return -1;
blob_mats[blob_index] = in;
return 0;
}
|
我们可以看到,它其实是先通过输入blob_name去找对应的blob_index,然后把blob_index作为blob_mats的id给blob_mats赋值.
我们再来看它是如何得到我们想要的输出的:
1
2
3
4
5
6
7
8
9
10
11
12
13
14
15
16
17
18
19
| int Extractor::extract(const char* blob_name, Mat& feat) {
int blob_index = net->find_blob_index_by_name(blob_name);
if (blob_index == -1) return -1;
return extract(blob_index, feat);
}
int Extractor::extract(int blob_index, Mat& feat) {
if (blob_index < 0 || blob_index >= (int)blob_mats.size()) return -1;
int ret = 0;
if (blob_mats[blob_index].dims == 0) {
int layer_index = net->blobs[blob_index].producer;
ret = net->forward_layer(layer_index, blob_mats, opt);
}
return 10;
}
|
首先它也是通过blob_name去得到我们想要的输出的blob的id(blob_index).然后检查这个blob_index对应的blob_mat[blob_index]是否是有值的,如果有值则直接返回对应的值.
如果这个blob_mats[blob_index]没有值,则再基于这个blob_index去通过net->blobs这个变量去找它对应的输入层的id(layer_index).
然后再调用net的forward函数去计算该层的输出top_blob.
forward函数是Net类的成员函数,它的作用是检查某一个层id所对应的bottom_blobs是否有值(之前已经被运算出来).
如果这个bottom_blob有值(已经被运算出来),那么它就用该层的bottom_blobs去调用对应Layer子类的forward函数来运算得到这个top_blobs.
如果这个bottom_blob没有值,则递归上述过程,直到某一层的bottom_blobs是有值的(不可能无限递归,至少input_blobs肯定有值),是不是很优雅.
我们来看一下它的实现:
1
2
3
4
5
6
7
8
9
10
11
12
13
14
15
16
17
18
19
20
21
22
23
24
25
26
27
28
29
30
31
32
33
34
35
36
37
38
39
40
41
42
|
int Net::forward_layer(int layer_index, std::vector<Mat>& blob_mats, const Option& opt) const {
const Layer* layer = layers[layer_index];
if (layer->one_blob_only) {
int bottom_blob_index = layer->bottoms[0];
int top_blob_index = layer->tops[0];
if (blob_mats[bottom_blob_index].dims == 0) {
int ret = forward_layer(blobs[bottom_blob_index].producer, blob_mats, opt);
if (ret != 0) return ret;
}
Mat bottom_blob = blob_mats[bottom_blob_index];
Mat top_blob;
int ret = layer->forward(bottom_blob, top_blob, opt);
if (ret != 0) return ret;
blob_mats[top_blob_index] = top_blob;
} else {
std::vector<Mat> bottom_blobs(layer->bottoms.size());
for (size_t i = 0; i < layer->bottoms.size(); i++) {
int bottom_blob_index = layer->bottoms[i];
if (blob_mats[bottom_blob_index].dims == 0) {
int ret = forward_layer(blobs[bottom_blob_index].producer, blob_mats, opt);
if (ret != 0) return ret;
}
bottom_blobs[i] = blob_mats[bottom_blob_index];
}
std::vector<Mat> top_blobs(layer->tops.size());
int ret = layer->forward(bottom_blobs, top_blobs, opt);
if (ret != 0) return ret;
for (size_t i = 0; i < layer->tops.size(); i++) {
int top_blob_index = layer->tops[i];
blob_mats[top_blob_index] = top_blobs[i];
}
}
return 0;
}
|
关于每一个Layer子类的成员函数前向forward.我们这里先用统一用Mat::clone这个接口来实现,也就是说每一个Layer子类的forward函数的作用都是对它的输入blob的复制操作.至于具体的每一类的实现,我们后面能再详细的学习.这里用convolution的forward函数来举个例子:
1
2
3
4
5
| `int Convolution::forward(const Mat& bottom_blob, Mat& top_blob, const Option& opt) const {
cout << "CONV FORWARD" << endl;
top_blob = bottom_blob.clone(opt.blob_allocator);
return 0;
}
|
代码示例
测试程序在这里.
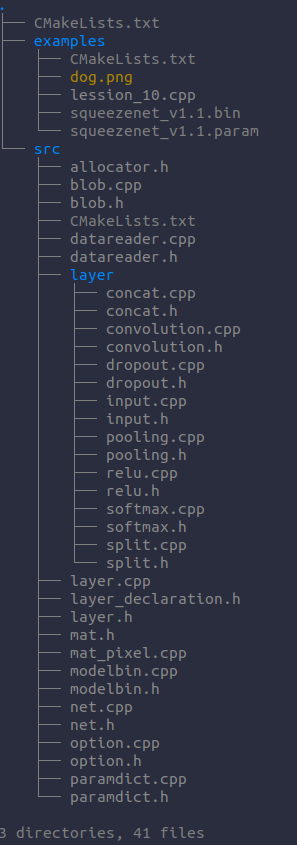
代码结构下如: